How to create the best flyer template!
Where to start
Step 1
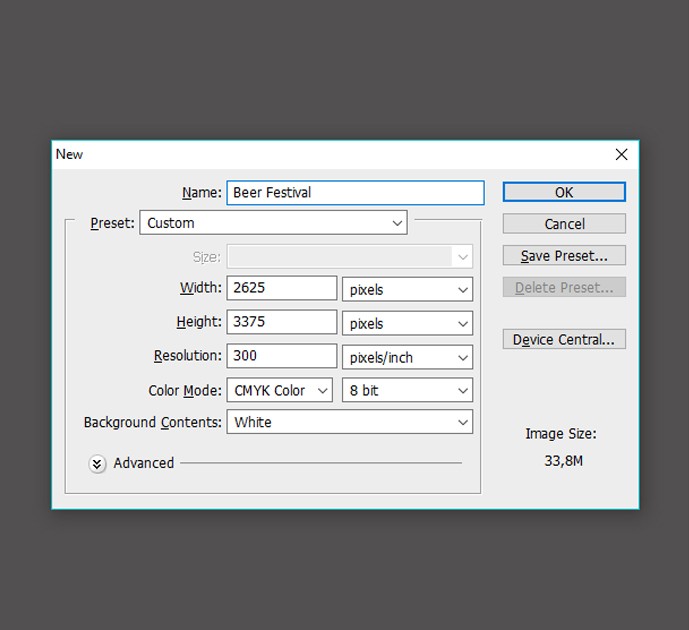
At the beginning, configure the document with the correct size and all the settings for printing. Create a new document in Photoshop and set its size to 2625×3375 pixels. Set Color Mode to CMYK and a resolution of 300 pixels / inch.
Step 2
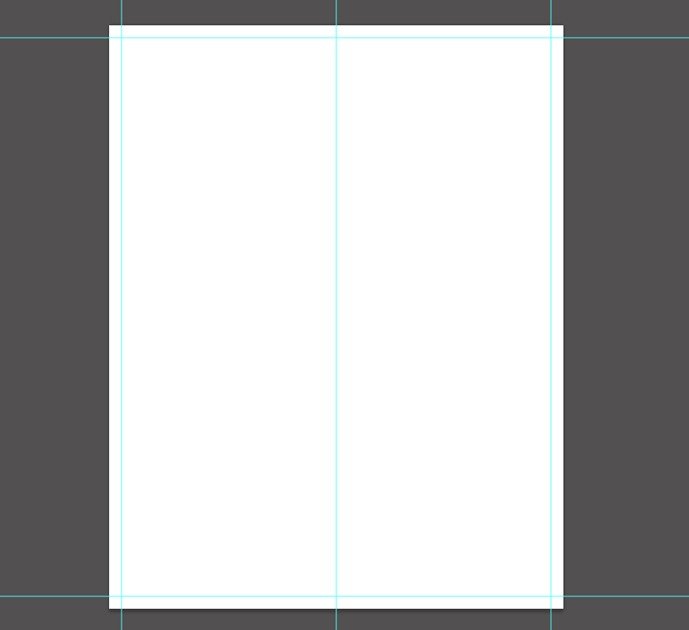
Create new guide lines, that will represent the area of removal. Do it with the help of Move Tool (V) and Shift, a key for creating a horizontal guide line, moving the cursor to the top line. Make sure that the guide line is 3 mm along the Y and X axes.
Creating a background
Step 1
Press Shift-Ctrl-N to create a new layer. Fill it with white foreground color (Alt-Backspace). Make sure that you turn on the CMYK sliders to use the colors for printing.
Step 2
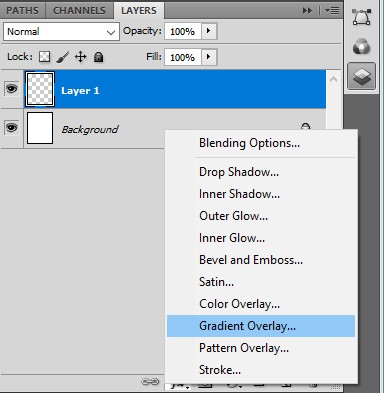
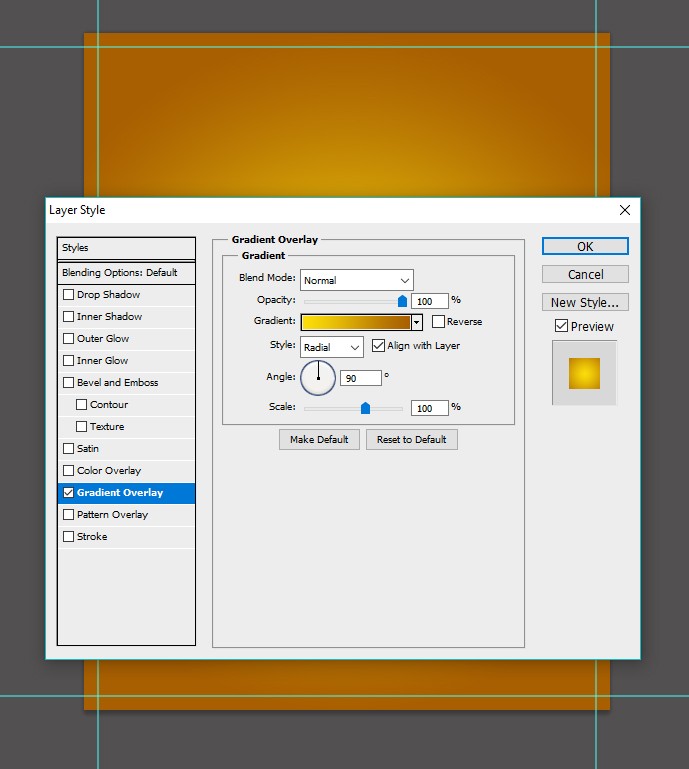
Create a new gradient overlay layer. Change the gradient in the Layer Style panel. Set the white slider using color C = 1 M = 14 Y = 93 K = 0. Change the color of the black slider C = 22 M = 66 Y = 100 K = 16. The gradient style is – Radial, Scale – 100%
Step 3
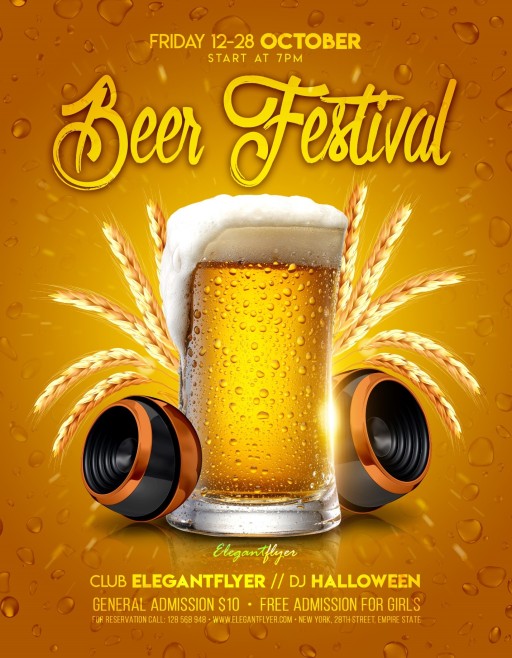
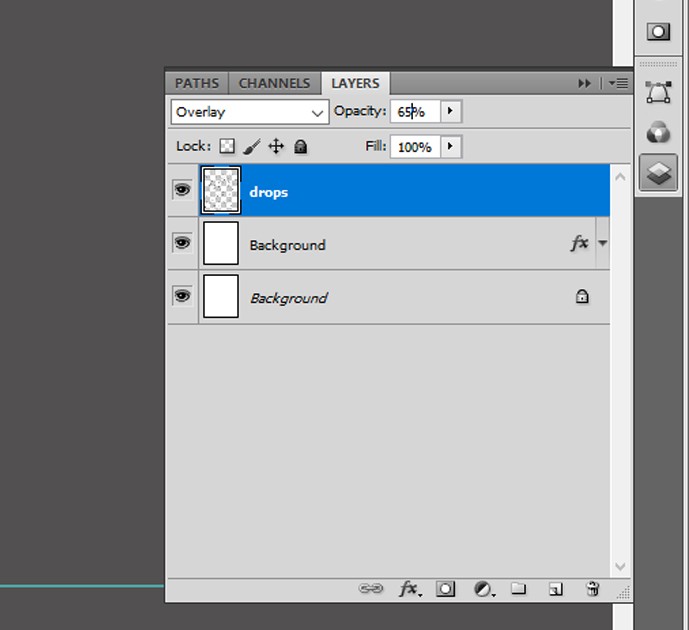
Place Drops in PNG on a new layer. Blend Mode – Overlay, Opacity – 65%. Add a layer mask and wipe the unnecessary with a soft brush.
Working with objects
Step 1
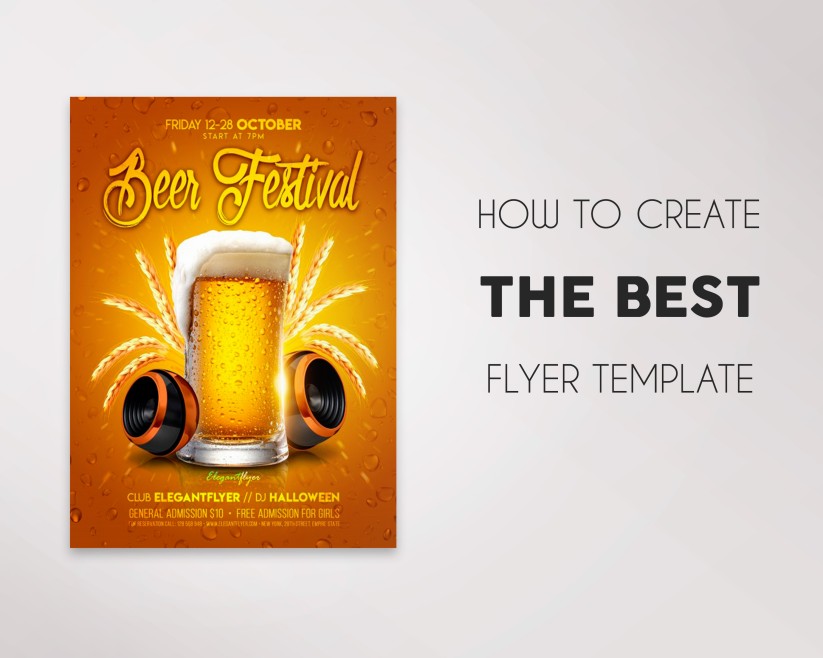
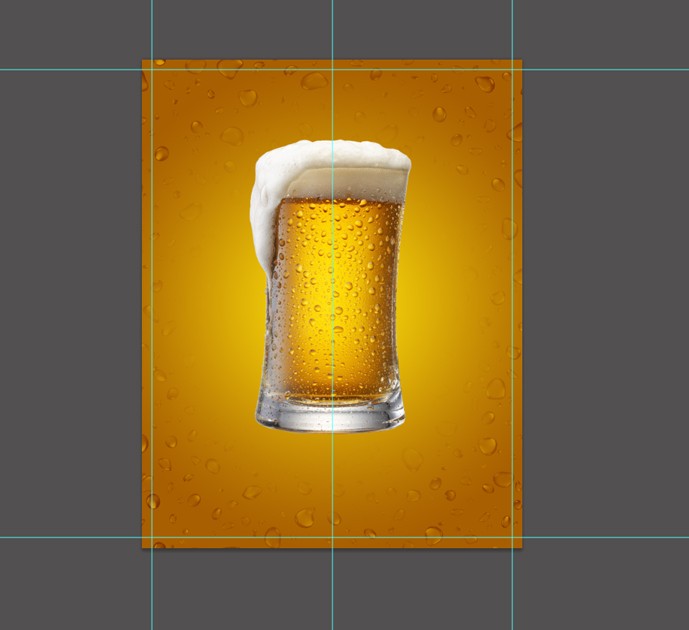
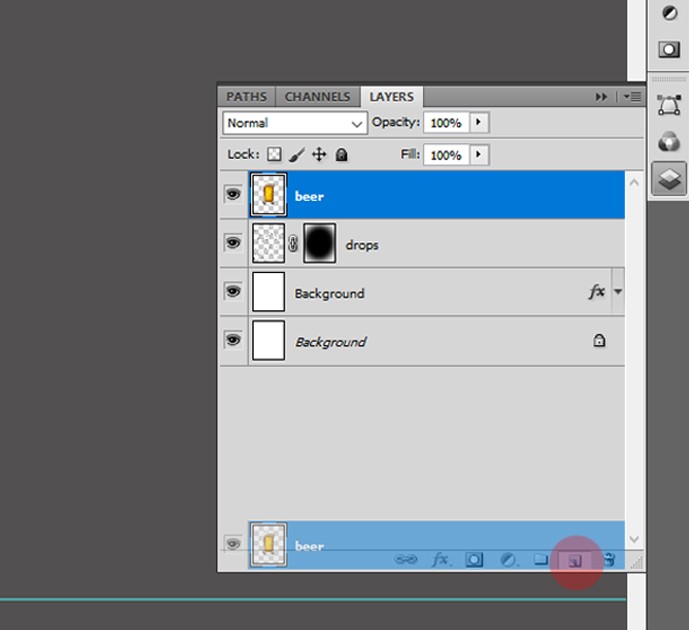
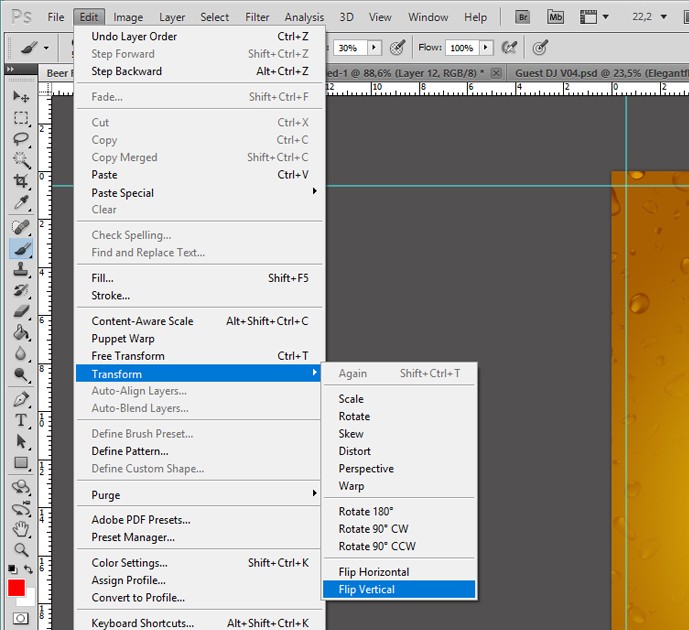
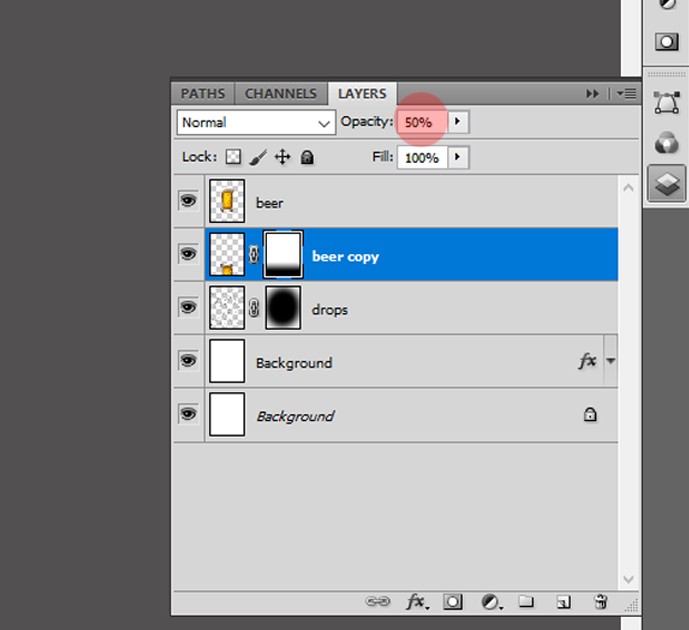
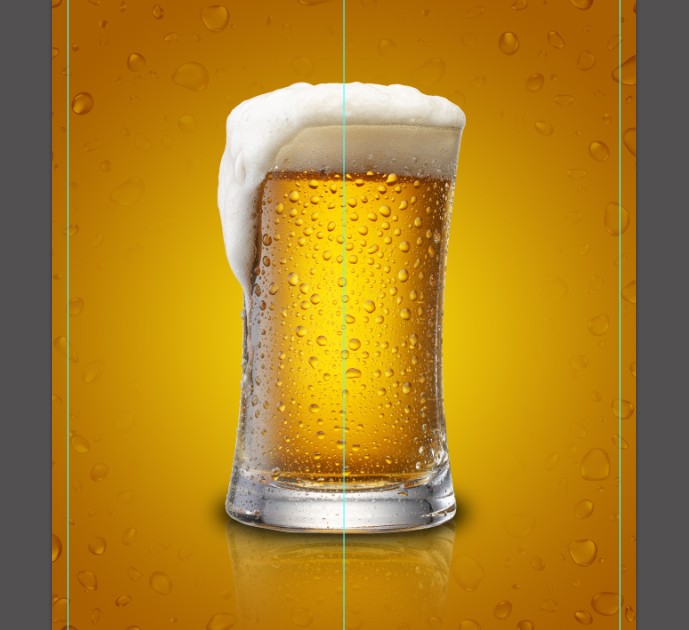
Put the image Beer in PNG. Duplicate the layer, reflect it vertically and add a mask layer using a gradient. The layer’s opacity is 50%.
Step 2
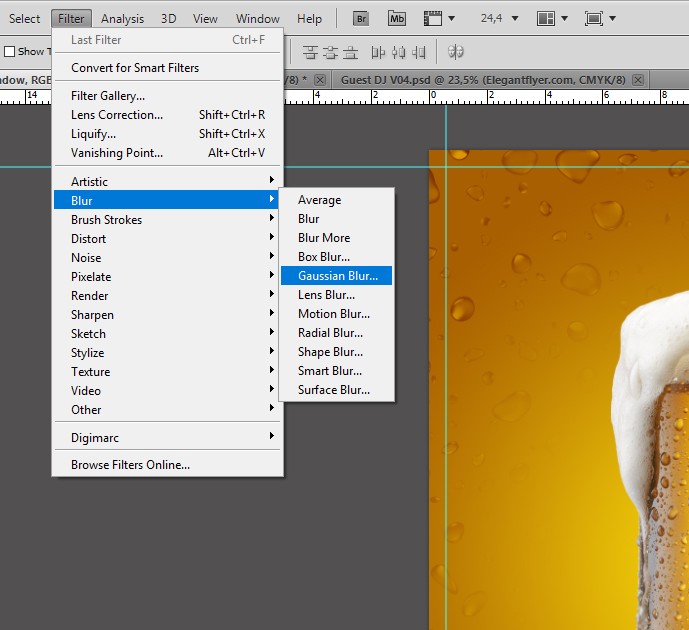
Create a new layer with the Ellipse tool, fill it with black color. Between “Beer” and “Reflection”, name it “Shadow”. Filter – Blur – Gaussian Blur, Radius – 45%
Step 3
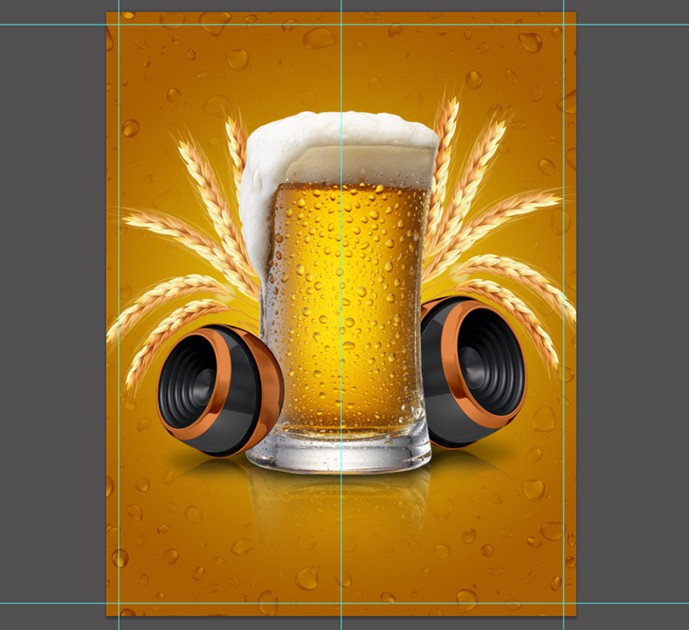
Do the same with other objects. Set Speaker, reflect, make a reflection with a layer mask using the gradient and add a shadow. Put the branches of wheat behind the glass.
Adding the text
Step 1
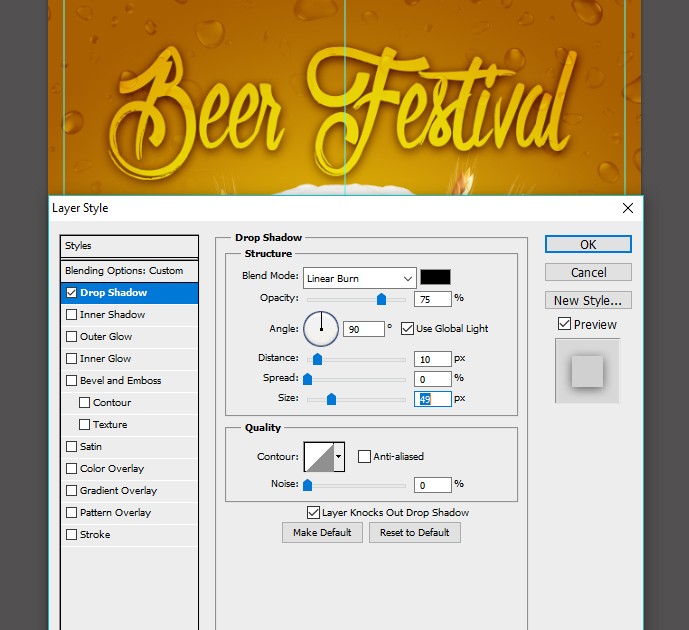
Create a new layer for the text. Write the text font – Olympic Branding, the size is 190 points, the overlay mode is Overlay. Add the layer style as it is shown on the picture below.
Step 2
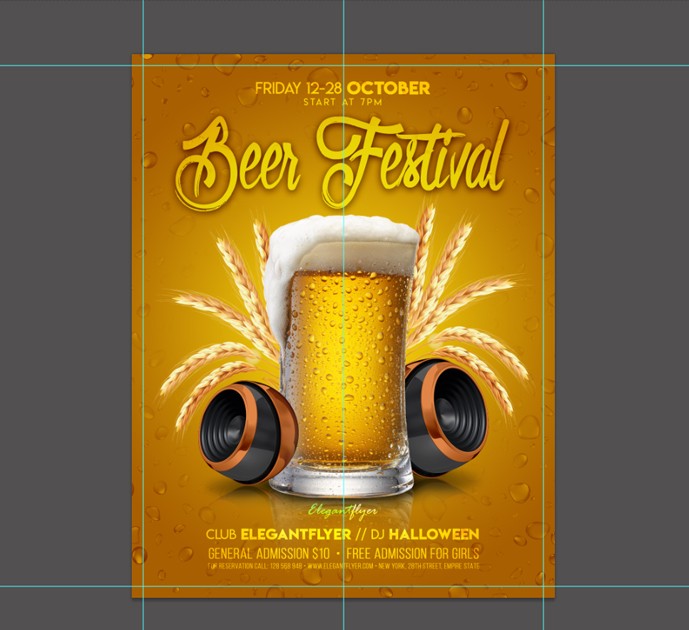
Create a new layer and add the other text. The color is white, the overlay mode is Overlay.
Improving the quality
Step 1
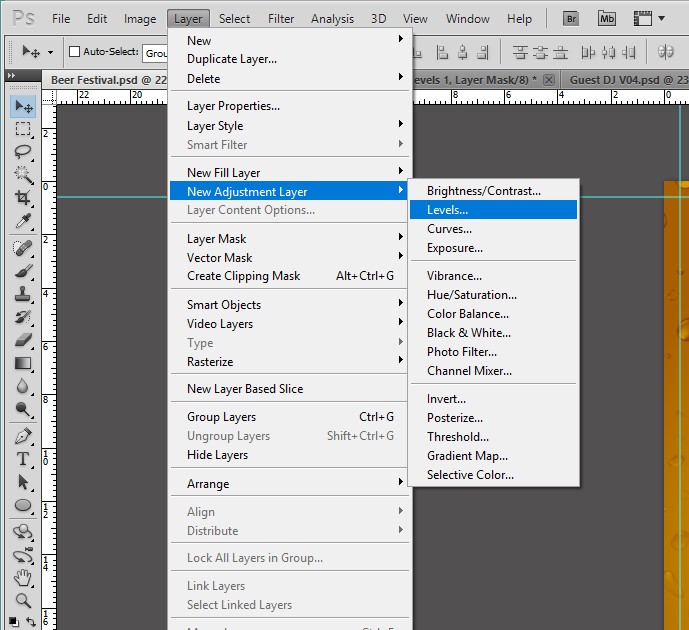
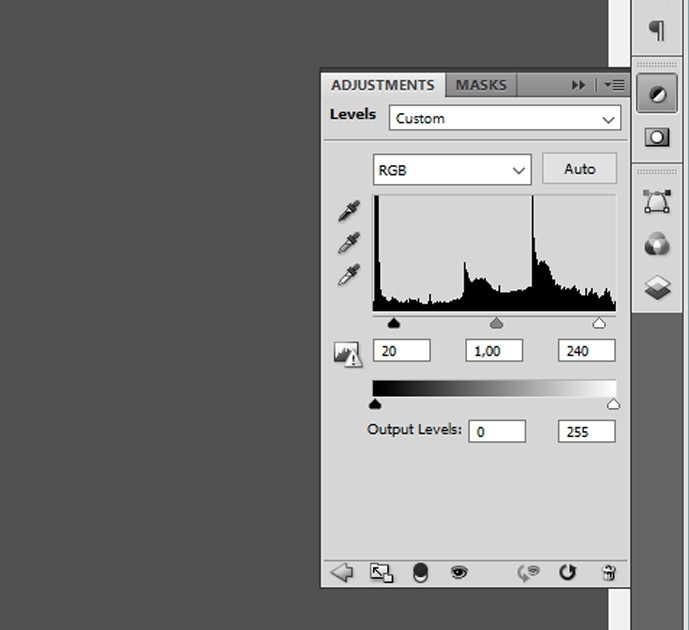
Add a new adjustment layer. Put the sliders as it is shown on the picture below.
Step 2
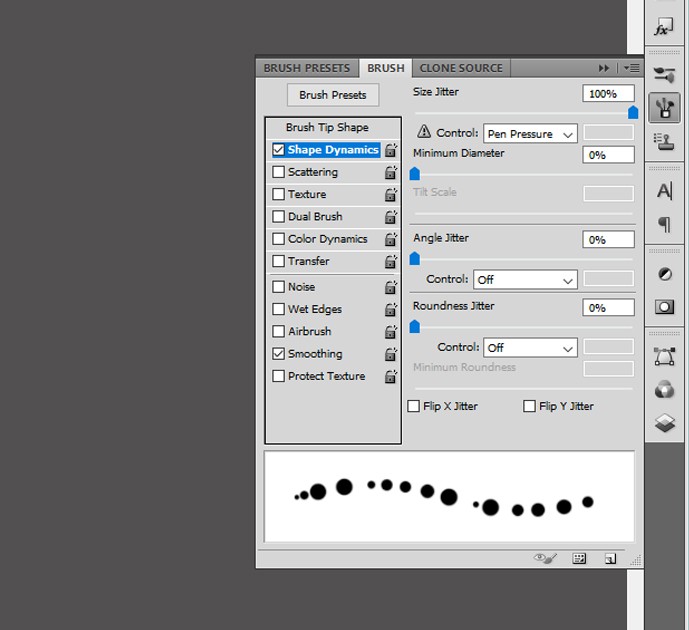
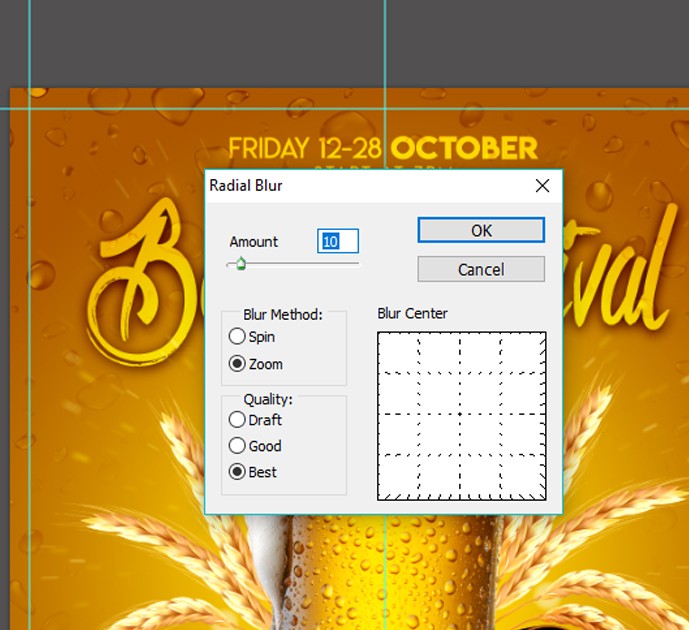
Draw points with a circular brush to add depth. Then blur it – Filter – Blur – Radial Blur.
Step 3
The final touch – add a highlight to the glass of beer in the PNG. The blending mode is Screen.
